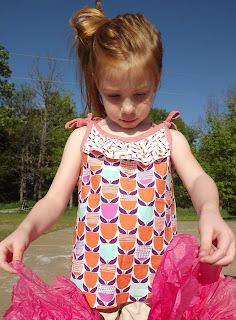
BTW, Fabricworm was awesome, some of the material was out of stock and after a few emails back and forth they had replacements ready and shipped out! Great customer service!
So after I was finished pouting, I said out loud "ruffle-tanks!" trust me I got a few stares from the offspring, but they are used to their crazy mama and went right along with their coloring.
So I let the girls paruse through the fabric, and with a little mama persuasion, they picked out two pieces to make their tops.
At nap time I drafted a pattern from a tee that fits Graceanne well, for the length, and shoulder height.
I didn't take any pictures of the process of making her shirt, dang it. But have no fear, I made two more!
I traced the pattern on both fabrics, I ended up making the back and front neck line the same, I did not keep the back neck line higher. I used one fabric for the front, and a different coordinating fabric for the back and front ruffle. When tracing the back fabric I only folded over the fabric half way to leave enough fabric for the ruffle.
I cut the ruffle the length of the fat quarter, and made it 3 inches wide. I ended up cutting each end off to match up with the curve of the armhole.
I then ran the ruffle strip through my serger to finish the edge with a rolled hem. Next I ran a gathering stitch along the opposite edge.
Pull on the gathering stitch to create the ruffle around the neck of the top front piece, pin in place and stitch it down.
I made bias tape with a coral ribbed knit, it is hard to find pretty ribbed knit fabric! I made 4 pieces, 1 for the front ruffle, back neck opening, and 2 for each arm hole. I made those 10 inches longer than the armhole to create a bow tied on each shoulder.
before pinning the bias tape down I cut the edge of the ruffle around the arm hole.
I love how easy these were! They will be worn a lot this summer!
These were a perfect match for my ordering boo boo! I still have 8 squares left! But I am ready for the challenge of thinking of something to make!


No comments:
Post a Comment